Mini Chocolate Pies Recipe
Introduction
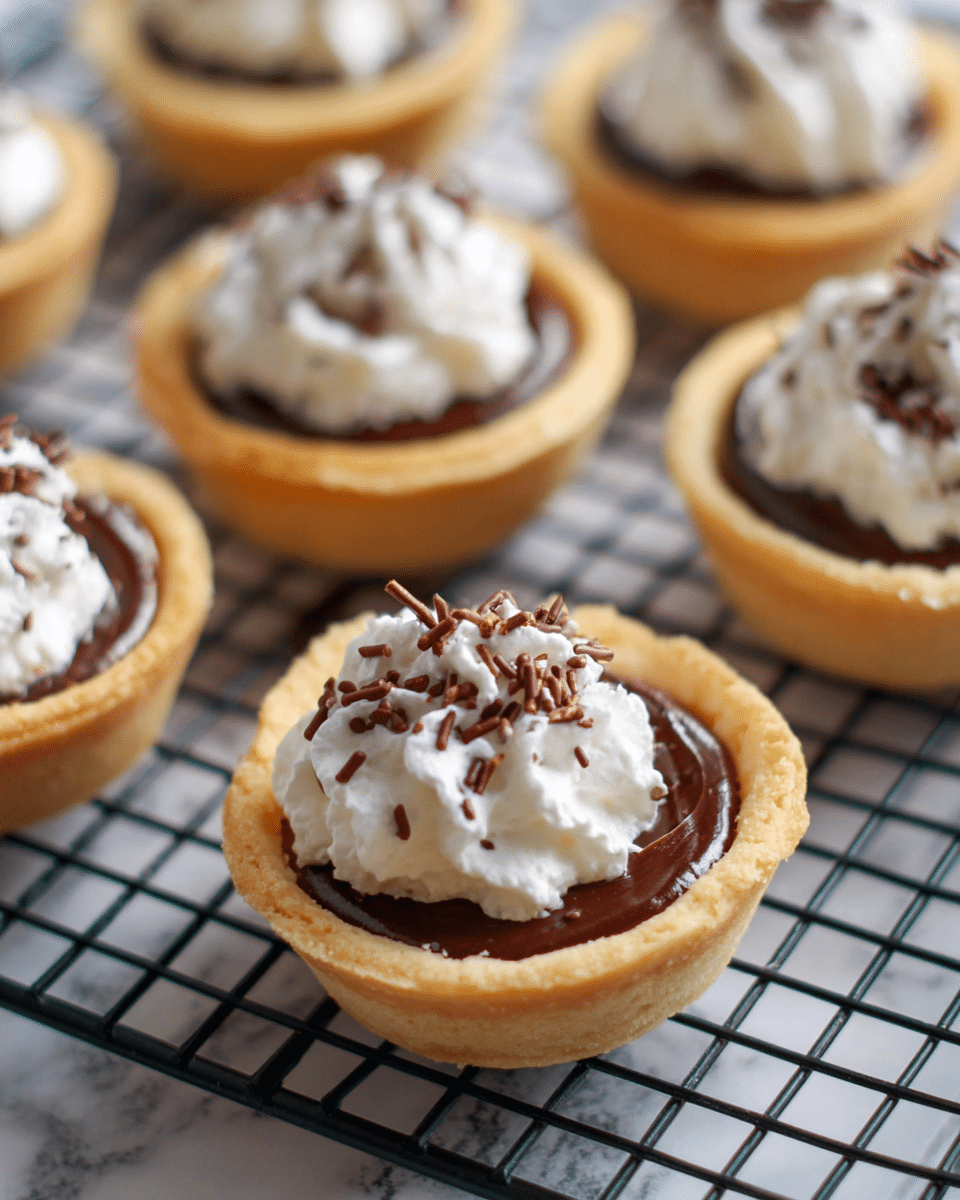
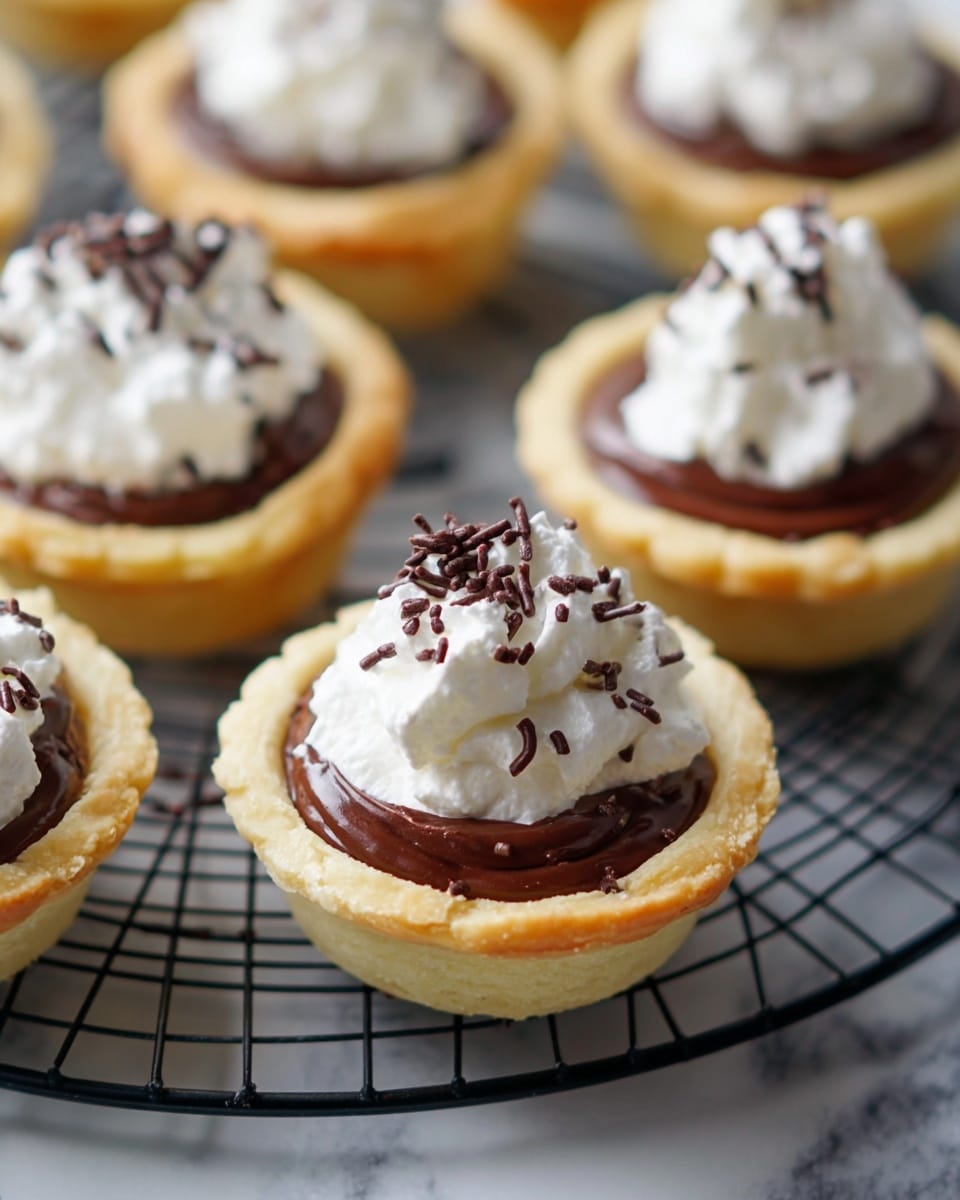
These Mini Chocolate Pies are perfect bite-sized treats that combine a flaky crust with a rich, creamy chocolate filling. Topped with whipped cream and chocolate sprinkles, they make an irresistible dessert for any occasion.
Ingredients
- 2 cups all-purpose flour
- 1 teaspoon salt
- 2/3 cup plus 2 tablespoons Crisco shortening
- 4-5 tablespoons cold water
- 1 (12-ounce) can evaporated milk
- 1 cup sugar
- 3 egg yolks
- 3 tablespoons unsweetened cocoa powder
- 2 tablespoons all-purpose flour
- 1 tablespoon margarine
- 2 teaspoons vanilla extract
- Cool Whip whipped topping, thawed
- Chocolate sprinkles
Instructions
- Step 1: Preheat the oven to 425 degrees F.
- Step 2: Sift 2 cups of flour and salt together into a large mixing bowl. Cut in the shortening thoroughly using a fork or pastry cutter. Stir in cold water, starting with 4 tablespoons and adding up to 1 tablespoon more if the dough seems too dry.
- Step 3: Gather the dough into a ball and roll it out on a floured surface slightly thinner than a full-size pie crust. Use a 4-inch circle cookie cutter to cut 12 circles.
- Step 4: Press the dough circles into the cups of a 12-cup muffin tin. Prick the bottom and sides with a fork to prevent bubbling.
- Step 5: Bake for 6-8 minutes until the dough is firm and lightly golden. Cool in the pan on a wire rack for 5 minutes, then remove the pies to cool completely on the wire rack.
- Step 6: In a heavy saucepan over medium heat, combine evaporated milk, sugar, egg yolks, cocoa powder, and the remaining 2 tablespoons of flour. Cook, stirring constantly, until the mixture thickens (about 12 minutes).
- Step 7: Remove from heat and stir in margarine and vanilla extract until fully blended and smooth.
- Step 8: Let the chocolate filling cool slightly until warm but not hot, then pour it into the baked pie crusts, filling each as much as possible.
- Step 9: Let the pies cool on the counter for 30 minutes, then refrigerate for at least 2 hours to set.
- Step 10: Before serving, top each mini pie with Cool Whip whipped topping and sprinkle with chocolate sprinkles. Keep refrigerated until ready to enjoy.
Tips & Variations
- For a richer crust, substitute half of the shortening with cold butter for a slightly flaky texture.
- Add a pinch of cinnamon or a drop of peppermint extract to the filling for a unique twist.
- If you don’t have a 4-inch cookie cutter, use a knife to cut circles from rolled dough using a small bowl as a guide.
- Mini chocolate chips can be sprinkled on top along with the sprinkles for extra texture.
Storage
Store the mini pies covered in the refrigerator for up to 3 days. Reheat is not recommended as the filling is best served chilled and creamy. For best taste, add the whipped topping just before serving.
How to Serve
Serve this delicious recipe with your favorite sides.
FAQs
Can I use butter instead of Crisco shortening for the crust?
Yes, you can substitute butter for shortening in equal amounts to achieve a richer and slightly flakier crust, though it may change the texture slightly.
Can these mini pies be frozen?
While you can freeze the baked crusts and filling separately, the whipped topping does not freeze well. Thaw thoroughly in the refrigerator before assembling and serving.
PrintMini Chocolate Pies Recipe

These Mini Chocolate Pies feature a tender homemade crust filled with a rich, creamy chocolate custard made from evaporated milk, cocoa, and egg yolks. Perfectly portioned in a muffin tin, these luscious pies are topped with whipped cream and chocolate sprinkles for an irresistible, bite-sized treat.
- Prep Time: 20 minutes
- Cook Time: 20 minutes
- Total Time: 2 hours 40 minutes
- Yield: 12 mini pies 1x
- Category: Dessert
- Method: Baking
- Cuisine: American
Ingredients
For the Crust:
- 2 cups all-purpose flour
- 1 teaspoon salt
- 2/3 cup plus 2 tablespoons Crisco shortening
- 4–5 tablespoons cold water
For the Filling:
- 1 12-ounce can evaporated milk
- 1 cup sugar
- 3 egg yolks
- 3 tablespoons unsweetened cocoa powder
- 2 tablespoons all-purpose flour
- 1 tablespoon margarine
- 2 teaspoons vanilla extract
Toppings:
- Cool Whip whipped topping, thawed
- Chocolate sprinkles
Instructions
- Preheat Oven: Preheat your oven to 425°F (220°C) to get ready for baking the pie crusts.
- Prepare the Dough: Sift together 2 cups of the flour and salt into a large mixing bowl. Cut in the shortening thoroughly using a fork or pastry cutter until the mixture resembles coarse crumbs. Gradually stir in 4 tablespoons of cold water, adding an extra tablespoon if the dough feels too dry. Gather the dough into a ball.
- Roll and Cut Dough: On a floured surface, roll out the dough slightly thinner than a standard pie crust. Using a 4-inch circle cookie cutter, cut out 12 circles from the dough.
- Line Muffin Tin: Press each dough circle into the cups of a 12-cup muffin tin. Prick the bottoms and sides of each crust with a fork to prevent bubbling during baking.
- Bake Crusts: Bake the crusts in the preheated oven for 6-8 minutes, until firm and lightly golden. Remove and cool in the pan on a wire rack for 5 minutes before gently removing to cool completely on the rack.
- Make Chocolate Filling: In a heavy saucepan over medium heat, combine evaporated milk, sugar, egg yolks, cocoa powder, and the remaining 2 tablespoons of flour. Cook, stirring constantly, until the mixture thickens, approximately 12 minutes. Remove from heat and stir in margarine and vanilla extract until fully melted and incorporated.
- Cool Filling: Transfer the filling to a large liquid measuring cup and let it cool for a few minutes until warm but not hot.
- Fill the Pies: Pour the chocolate filling into the baked crusts, filling each as much as possible. Allow to cool on the counter for 30 minutes.
- Chill: Transfer the filled pies to the refrigerator and chill for at least two hours until fully set.
- Add Toppings and Serve: Once set, top each mini pie with a dollop of Cool Whip whipped topping and sprinkle with chocolate sprinkles. Keep refrigerated until ready to serve.
Notes
- Ensure the dough isn’t too thick when rolling out for a crisp, delicate crust.
- If the filling is too thick while cooking, stir gently to avoid lumps.
- Cool the pies completely before adding whipped topping to prevent melting.
- These pies can be stored covered in the refrigerator for up to 3 days.
- For added texture, consider garnishing with crushed nuts or a dusting of powdered sugar instead of sprinkles.
Keywords: mini chocolate pies, chocolate custard pie, bite-sized desserts, homemade pie crust, easy chocolate pies, mini desserts