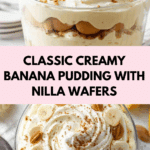
Creamy Banana Pudding with Nilla Wafers Recipe
Introduction
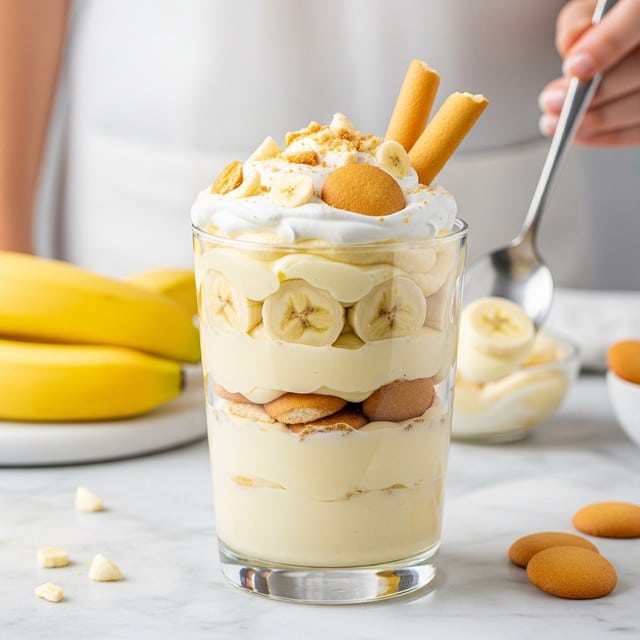
Banana pudding is a beloved classic dessert that combines creamy vanilla pudding, fresh bananas, and crunchy Nilla Wafers for a delightful treat. This recipe is easy to prepare and perfect for gatherings or a comforting homemade dessert.

Ingredients
- 1 (14-ounce) can sweetened condensed milk
- 1 1/2 cups ice cold water
- 1 (3.4-ounce) box vanilla instant pudding mix
- 3 cups heavy cream
- 4 cups sliced barely ripe bananas
- 1 (12-ounce) box Nilla Wafers
Instructions
- Step 1: Beat the sweetened condensed milk and ice cold water together in a large bowl using a hand mixer until combined. Add the vanilla instant pudding mix and continue to beat well for 2-3 minutes. Cover and refrigerate for at least 4 hours or overnight to allow the pudding to fully set.
- Step 2: In a separate large bowl, beat the heavy cream with an electric mixer or stand mixer fitted with the whisk attachment until stiff peaks form. Gently fold the whipped cream into the chilled pudding mixture, being careful not to deflate the whipped cream but ensuring it is evenly mixed.
- Step 3: In a trifle dish, 9×13-inch pan, or individual serving cups, arrange one-third of the Nilla Wafers in an even layer at the bottom. Add one-third of the sliced bananas on top of the wafers, then spoon one-third of the pudding mixture over the bananas.
- Step 4: Repeat the layering two more times with the remaining Nilla Wafers, bananas, and pudding. Reserve a few wafers and banana slices for garnish on top.
- Step 5: Cover the assembled pudding with plastic wrap and refrigerate for at least 4 hours and up to 8 hours to allow the layers to set and the wafers to soften slightly. Avoid chilling for longer than 8 hours to prevent the bananas from browning excessively.
Tips & Variations
- Use barely ripe bananas for the best texture and sweetness; overly ripe bananas may become mushy in the pudding.
- For a boozy twist, add a tablespoon of bourbon or rum to the pudding mixture before folding in the whipped cream.
- Substitute the Nilla Wafers with homemade vanilla cookies or ladyfingers for a different texture.
- To keep bananas from browning, toss the slices with a little lemon juice before layering.
Storage
Store the banana pudding covered in the refrigerator for up to 2 days for the best texture and flavor. After this, the bananas may brown and the wafers may become too soft. When ready to serve, stir gently if needed to refresh the texture or let it sit at room temperature for 10-15 minutes for a softer consistency.
How to Serve

Serve this delicious recipe with your favorite sides.
FAQs
Can I make banana pudding ahead of time?
Yes, this banana pudding benefits from making ahead to allow the flavors to meld and the wafers to soften. It’s best to prepare it at least 4 hours in advance, ideally overnight, but not more than 8 hours to avoid browning bananas.
Can I substitute the heavy cream?
Heavy cream is important for the rich, creamy texture of this pudding. You could use whipping cream as a substitute, but lighter creams or non-dairy alternatives may not whip up as well or provide the same consistency.
PrintCreamy Banana Pudding with Nilla Wafers Recipe

This classic Banana Pudding recipe features layers of creamy vanilla pudding, whipped cream, ripe bananas, and crunchy Nilla Wafers. The pudding is made with sweetened condensed milk and instant vanilla pudding mix, then folded with freshly whipped cream for a light and airy texture. Layered in a dish and chilled to perfection, this dessert is a comforting Southern favorite that’s perfect for family gatherings or any occasion.
- Prep Time: 20 minutes
- Cook Time: 0 minutes
- Total Time: 4 hours 20 minutes
- Yield: 8–10 servings 1x
- Category: Dessert
- Method: No-Cook
- Cuisine: Southern American
Ingredients
For the Pudding
- 1 (14-ounce) can sweetened condensed milk
- 1 1/2 cups ice cold water
- 1 (3.4-ounce) box vanilla instant pudding mix
For the Whipped Cream
- 3 cups heavy cream
For Assembly
- 4 cups sliced barely ripe bananas
- 1 (12-ounce) box Nilla Wafers
Instructions
- Prepare the pudding: In a large bowl, beat the sweetened condensed milk and ice cold water together using a hand mixer until well combined. Add the vanilla instant pudding mix to the bowl and continue beating for 2-3 minutes until fully incorporated. Cover and refrigerate the mixture for at least 4 hours or overnight to allow it to chill and set.
- Whip the cream: In a separate large bowl, use an electric or stand mixer fitted with the whisk attachment to beat the heavy cream until stiff peaks form. This will give the cream a light and fluffy texture essential for folding into the pudding.
- Fold whipped cream into pudding: Gently fold the whipped cream into the chilled pudding mixture using a spatula. Take care to combine evenly while keeping the whipped cream light and not deflating it too much for a creamy texture.
- Layer the dessert: In a trifle dish, 9×13-inch pan, or individual serving jars, start by arranging one-third of the Nilla Wafers at the bottom. Add one-third of the sliced bananas on top of the wafers, then spoon one-third of the pudding mixture over the bananas.
- Repeat layers: Repeat the layering process two more times using the remaining wafers, bananas, and pudding mixture. Reserve some bananas and wafers to decorate the top layer for a beautiful presentation.
- Chill and serve: Cover the assembled dessert with plastic wrap and refrigerate for at least 4 hours, up to 8 hours, allowing the pudding to fully set and the wafers to soften slightly. Avoid chilling longer than 8 hours to prevent the bananas from browning. Serve chilled for best flavor and texture.
Notes
- Use firm but ripe bananas to prevent them from turning mushy after chilling.
- For best results, prepare the pudding the day before you plan to serve the dessert to allow ample chilling time.
- You can substitute heavy cream with whipped topping for a lighter alternative.
- To avoid browning bananas, add lemon juice to sliced bananas before layering if you plan to serve after longer chilling.
- This dessert is best enjoyed within 1-2 days of assembly for optimal freshness.
Keywords: Banana pudding, classic banana pudding recipe, layered dessert, Nilla Wafers, vanilla pudding, whipped cream dessert