No-Bake Pineapple Cream Dessert Recipe
Introduction
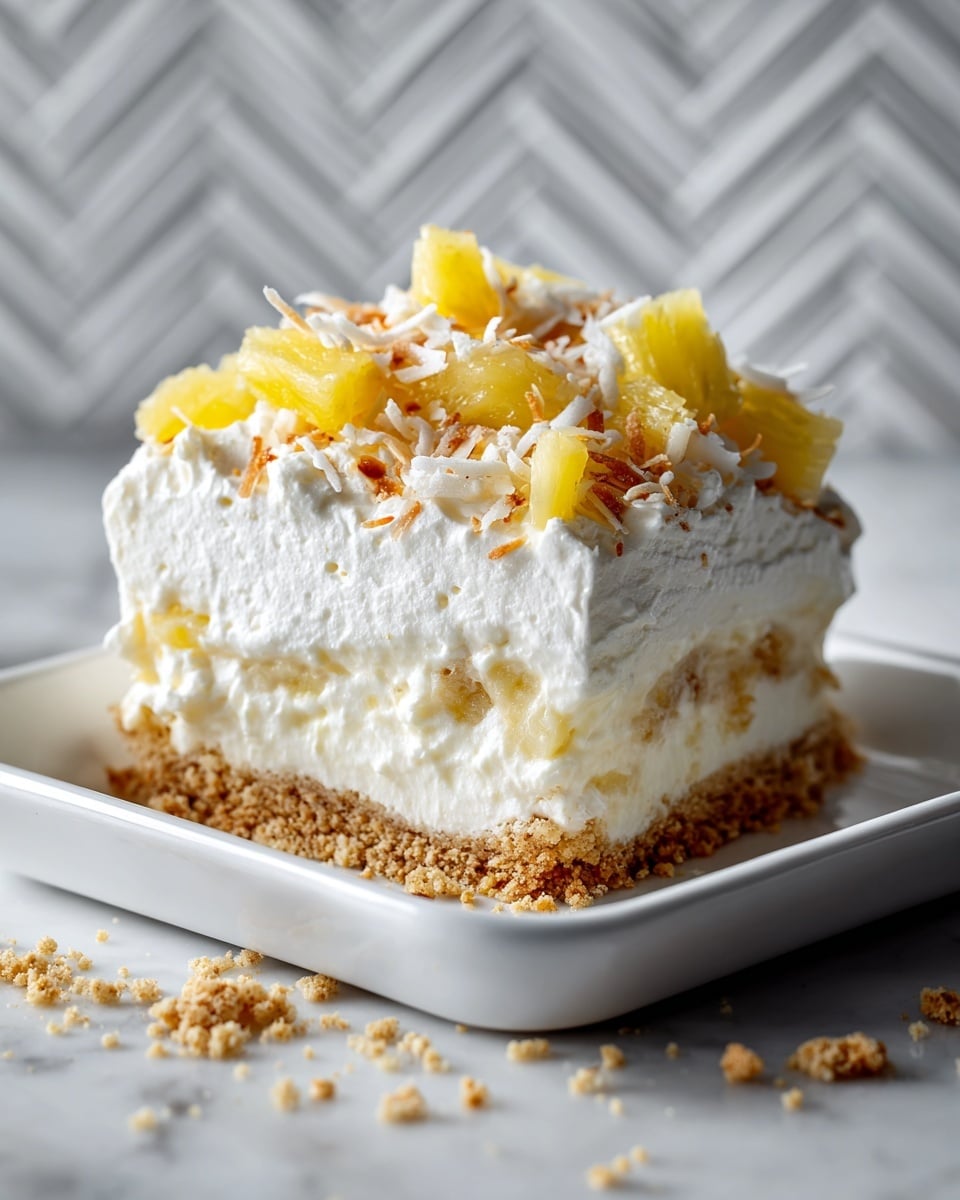
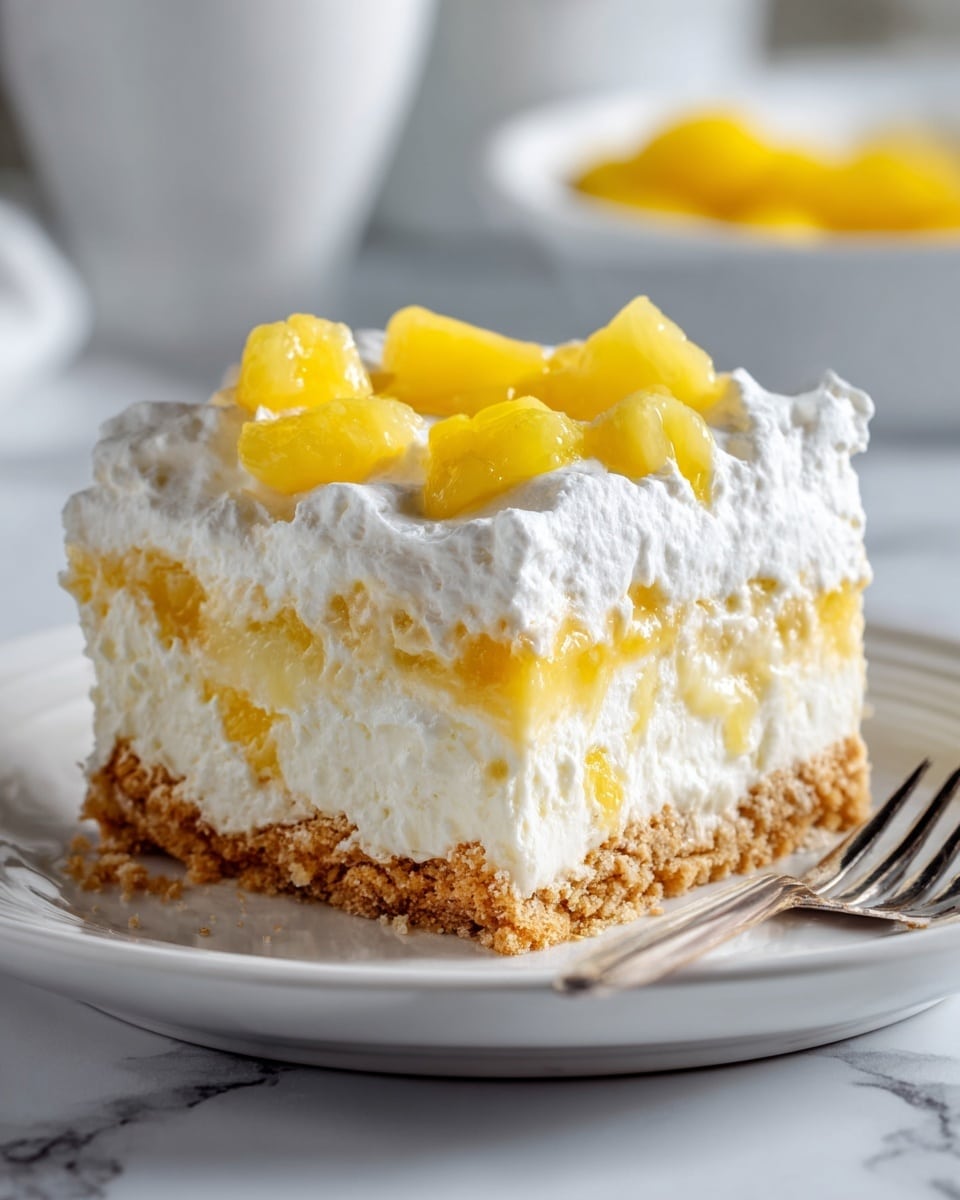
This No-Bake Pineapple Cream Dessert is a refreshing and creamy treat that’s perfect for warm days or when you want a quick, fuss-free dessert. With a buttery graham cracker crust, smooth cream cheese filling, and tropical pineapple flavors, it’s a crowd-pleaser that’s easy to make.
Ingredients
- 8 oz softened cream cheese
- 8 oz tub whipped topping
- 14-16 oz large can crushed pineapple, drained
- 3/4 cup confectioner’s sugar
- 1/2 cup pineapple chunks
- 1/2 cup shredded coconut for topping
- 1 1/2 cups graham cracker crumbs
- 1/3 cup sugar
- 1/2 cup butter, melted
Instructions
- Step 1: For the crust, combine the graham cracker crumbs and sugar in a bowl. Add the melted butter and stir until well mixed. Press this mixture evenly into an 8 x 8- or 9 x 9-inch pan to form the crust.
- Step 2: In a large bowl, beat the softened cream cheese and confectioner’s sugar together until very smooth and creamy.
- Step 3: Gently beat in the whipped topping until fully incorporated, then carefully fold in the drained crushed pineapple.
- Step 4: Spread the pineapple cream filling evenly over the prepared crust. Top with pineapple chunks and sprinkle shredded coconut over the surface.
- Step 5: Chill the dessert in the refrigerator for at least 4 hours, preferably overnight, to let it set and develop flavor before serving.
Tips & Variations
- For extra crunch, add chopped nuts like macadamia or pecans to the crust mixture.
- Use fresh pineapple chunks instead of canned for a fresher taste and texture.
- Substitute shredded coconut with toasted coconut to add a deeper coconut flavor.
- Serve with a drizzle of caramel or a sprinkle of cinnamon for a unique twist.
Storage
Store the dessert covered in the refrigerator for up to 3 days. Keep it chilled until ready to serve, as the cream cheese filling softens at room temperature. If you’d like to prepare it ahead, make sure it is well covered to prevent it from absorbing other fridge odors.
How to Serve
Serve this delicious recipe with your favorite sides.
FAQs
Can I use a different type of crust?
Yes, you can substitute the graham cracker crust with a digestive biscuit crust or even a simple cookie crumb base. Just keep the proportions of crumbs, sugar, and butter the same for the best results.
Is it necessary to drain the pineapple?
Draining the pineapple is important to avoid excess moisture in the filling, which can make the dessert too watery and prevent it from setting properly.
PrintNo-Bake Pineapple Cream Dessert Recipe

This No-Bake Pineapple Cream Dessert is a luscious, creamy treat combining a buttery graham cracker crust with a smooth pineapple and cream cheese filling, topped with pineapple chunks and shredded coconut. Perfectly chilled, it’s a refreshing and easy dessert that requires no oven time.
- Prep Time: 15 minutes
- Cook Time: 0 minutes
- Total Time: 4 hours 15 minutes (includes chilling time)
- Yield: 9 servings 1x
- Category: Dessert
- Method: No-Cook
- Cuisine: American
Ingredients
Crust
- 1 1/2 cups graham cracker crumbs
- 1/3 cup sugar
- 1/2 cup butter, melted
Filling
- 8 oz softened cream cheese
- 3/4 cup confectioner’s sugar
- 8 oz tub whipped topping
- 14–16 oz large can crushed pineapple, drained
Topping
- 1/2 cup pineapple chunks
- 1/2 cup shredded coconut
Instructions
- Prepare the Crust: Mix the graham cracker crumbs and sugar in a bowl. Add the melted butter and stir until well combined. Press this mixture firmly into an 8 x 8- or 9 x 9-inch pan to form an even crust layer.
- Make the Filling Base: In a large bowl, beat the softened cream cheese and confectioner’s sugar together until the mixture is very smooth and creamy.
- Incorporate Whipped Topping and Pineapple: Beat in the tub of whipped topping into the cream cheese mixture until fully combined. Then gently fold in the well-drained crushed pineapple to maintain a light texture.
- Assemble the Dessert: Spread the pineapple cream filling evenly over the prepared crust in the pan. Arrange the pineapple chunks on top and sprinkle with shredded coconut for added texture and flavor.
- Chill and Set: Refrigerate the dessert thoroughly for at least 4 hours, but preferably overnight, to allow it to firm up and the flavors to meld beautifully before serving.
Notes
- Make sure to drain the crushed pineapple well to prevent the crust from becoming soggy.
- For extra flavor, you can toast the shredded coconut before sprinkling it on top.
- This dessert is best served chilled straight from the refrigerator.
- Use a pan with removable sides for easier slicing and serving if available.
Keywords: no bake dessert, pineapple cream dessert, pineapple dessert, cream cheese dessert, easy no bake, graham cracker crust