Sticky Coconut Cake Recipe
Introduction
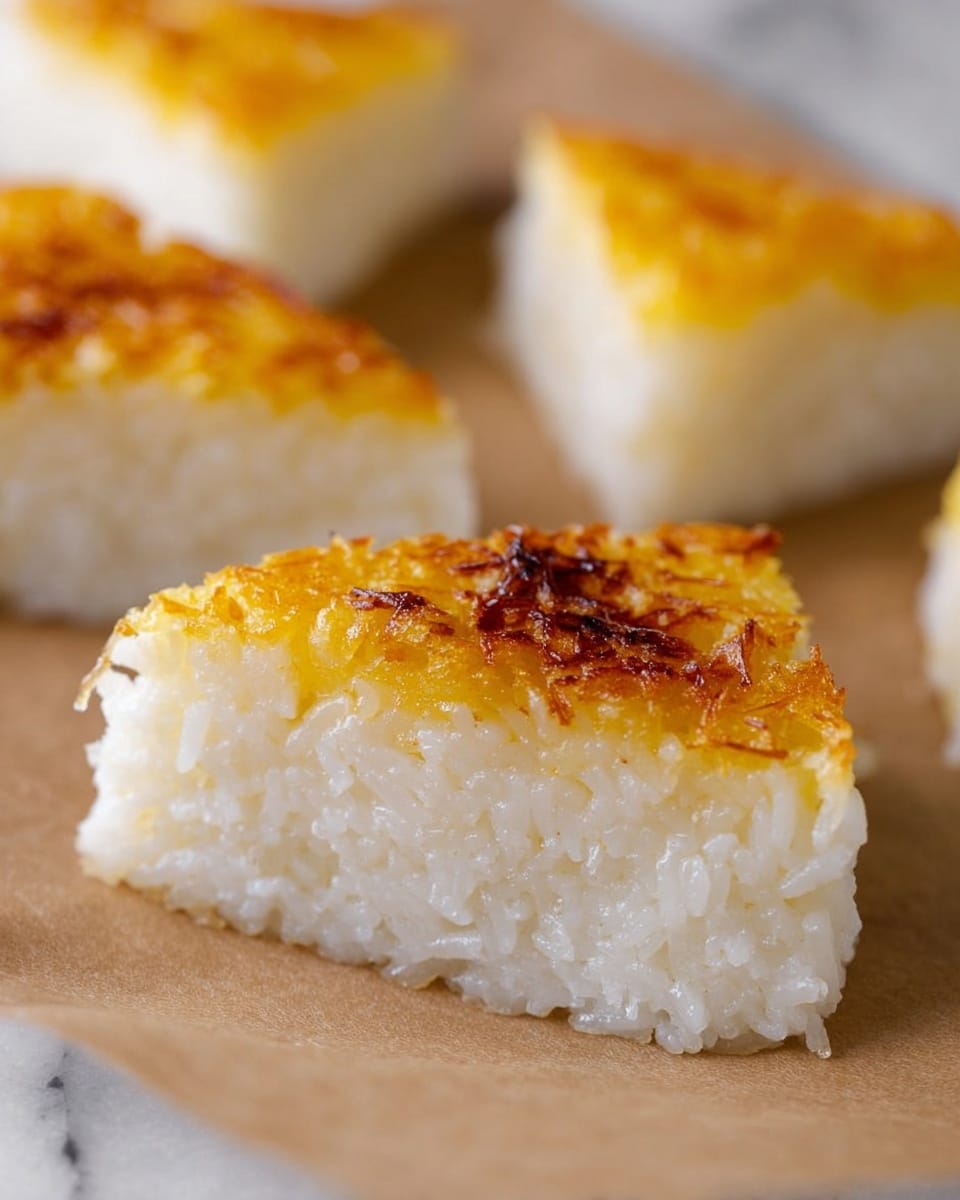
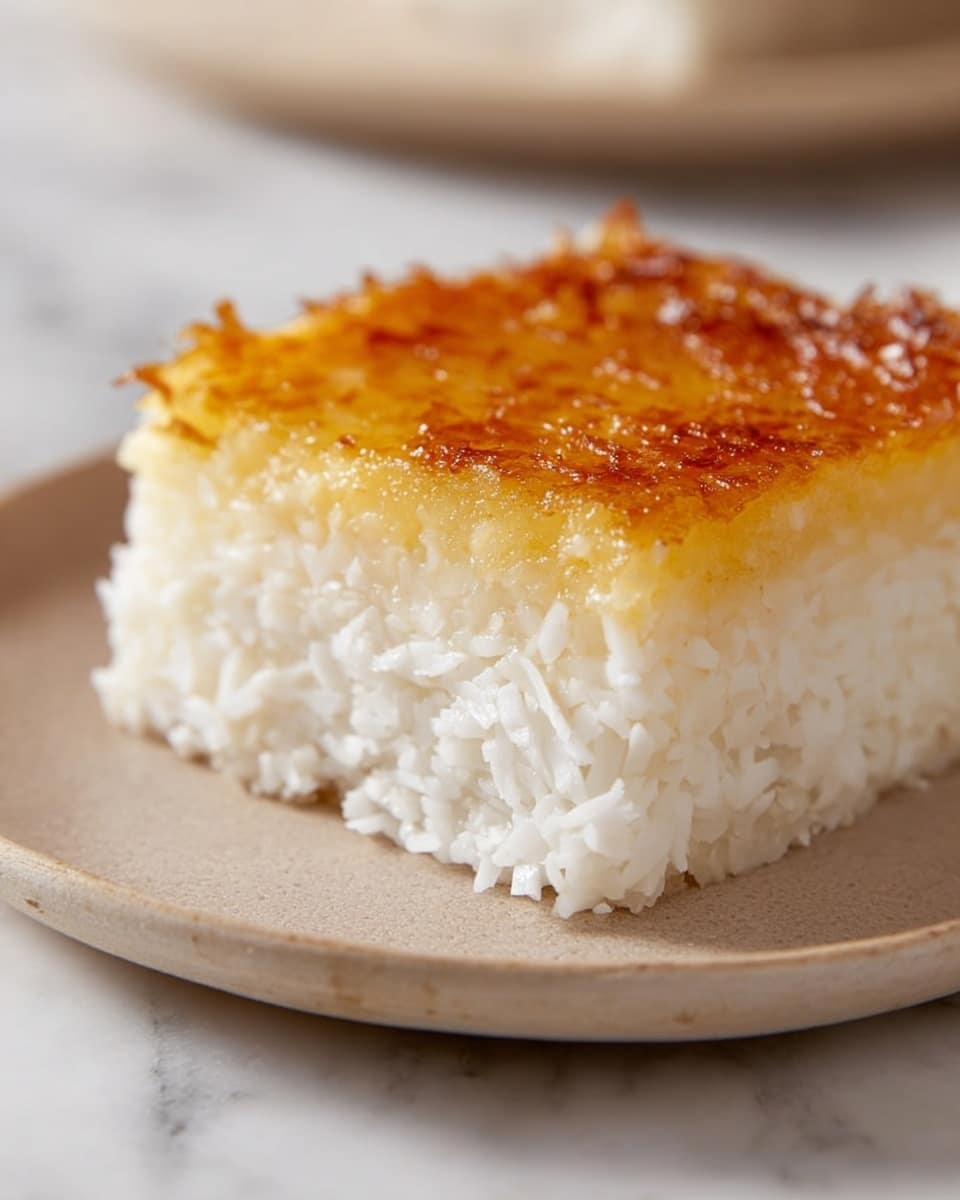
Sticky Coconut Cake is a luscious, chewy dessert that showcases the rich flavor of coconut in every bite. This unique cake combines shredded coconut and glutinous rice flour to create a delightfully sticky texture that’s perfect for a sweet treat any time of day.
Ingredients
- 2 eggs (separated)
- 1¼ cup granulated sugar
- 2¼ cup full fat canned coconut milk
- 3 cups shredded sweetened coconut
- 1½ cup glutinous rice flour
- 1 teaspoon vanilla extract
Instructions
- Step 1: Preheat your oven to 350° F.
- Step 2: In a medium bowl, whisk the egg whites and sugar together until well combined. Slowly add coconut milk, shredded coconut, rice flour, and vanilla extract. Mix thoroughly to remove any lumps; the batter will be thin and liquidy.
- Step 3: Pour the batter into an 8×8-inch baking pan and bake for 45 minutes in the preheated oven.
- Step 4: Carefully remove the pan and brush the egg yolks evenly over the top of the cake. Switch your oven to broil and broil the cake for 5 to 10 minutes, watching closely until the top turns golden brown.
- Step 5: Allow the cake to cool completely on a wire rack. Once cooled, cover the pan with plastic wrap and refrigerate overnight or for at least 8 hours to let the cake set. Cut into squares or triangles and serve chilled or at room temperature.
Tips & Variations
- For a stronger coconut flavor, toast the shredded coconut lightly before adding it to the batter.
- If you don’t have glutinous rice flour, you can substitute with mochiko flour for a similar texture.
- To add texture, sprinkle chopped nuts like macadamia or almonds on top before broiling.
- Use full-fat canned coconut milk for the best richness and sticky consistency.
Storage
Store the cake covered in the refrigerator for up to 4 days. It is best enjoyed cold or at room temperature. Reheat gently in a microwave if you prefer it warm, but avoid overheating to maintain its sticky texture.
How to Serve
Serve this delicious recipe with your favorite sides.
FAQs
Can I use fresh coconut instead of shredded sweetened coconut?
Fresh coconut can be used, but it will alter the texture and sweetness. If using fresh coconut, consider adding more sugar to balance the flavor.
Why do I need to separate the eggs?
Separating the eggs allows the whites to be whisked with sugar for a smoother batter, while the yolks are brushed on top before broiling to create a glossy, golden finish.
PrintSticky Coconut Cake Recipe

This Sticky Coconut Cake is a luscious, rich dessert made with glutinous rice flour, sweetened shredded coconut, and full-fat coconut milk, producing a moist, chewy, and sweet treat. The cake is baked until set and then topped with egg yolks that caramelize under the broiler for a golden finish. It’s best served chilled or at room temperature, making it a perfect tropical-inspired dessert for any occasion.
- Prep Time: 15 minutes
- Cook Time: 45 minutes baking + 5-10 minutes broiling
- Total Time: 1 hour 10 minutes plus 8 hours chilling
- Yield: 9–12 servings 1x
- Category: Dessert
- Method: Baking
- Cuisine: Southeast Asian
- Diet: Gluten Free
Ingredients
Eggs
- 2 eggs (separated)
Dry Ingredients
- 1¼ cup granulated sugar
- 3 cups shredded sweetened coconut
- 1½ cup glutinous rice flour
Wet Ingredients
- 2¼ cup full fat canned coconut milk
- 1 teaspoon vanilla extract
Instructions
- Preheat Oven: Preheat your oven to 350° F (175° C) to get it ready for baking the cake.
- Prepare Batter: In a medium bowl, whisk the egg whites and granulated sugar together until well combined. Gradually add in the coconut milk, shredded sweetened coconut, glutinous rice flour, and vanilla extract. Mix thoroughly to ensure no lumps remain, resulting in a thin, liquidy batter.
- Bake Cake: Pour the batter into an 8×8-inch baking pan and bake for 45 minutes at 350° F. The cake should be set but still moist.
- Broil Topping: Remove the cake from the oven and carefully brush the separated egg yolks over the top of the cake. Switch the oven setting to broil and place the cake back in for 5 to 10 minutes. Watch carefully—broil just until the top turns a golden brown and caramelizes.
- Cool and Chill: Set the cake with the pan on a wire rack to cool completely to room temperature. Once cooled, cover the cake with plastic wrap and refrigerate for at least 8 hours or overnight to allow it to fully set.
- Serve: Cut into squares or triangles and serve cold from the fridge or at room temperature for the best texture and flavor.
Notes
- Using glutinous rice flour is essential for the cake’s sticky and chewy texture.
- Ensure the egg whites are well whisked with sugar to help incorporate air and sweetness.
- Be vigilant when broiling as the egg yolk topping can brown quickly.
- Chilling overnight is crucial for proper setting and easier slicing.
- This cake is naturally gluten-free due to the rice flour.
- Serve chilled for the best sticky texture and flavor.
Keywords: Sticky Coconut Cake, Glutinous Rice Flour Cake, Coconut Dessert, Southeast Asian Dessert, Gluten Free Cake